Using Custom Site Preferences in SFCC

This is a guide for creating custom site preferences for use with Salesforce Commerce Cloud. Site preferences let users of Business Manger (BM) define settings that are used in code. For information visit korucaredoula .

You can see available site preferences in Merchant Tools / Site Preferences / Custom Preferences. They are organized by groups (e.g. per cartridge).

Creating New Preferences
First create a group for your set of preferences in BM by going to Merchant Tools / Site Preferences / Custom Preferences and clicking New. If you simply need to add a new preference to an existing group, skip this step.

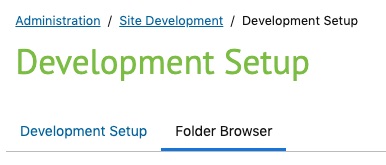
The next steps are a bit roundabout. Firstly, you have to go to Administration > Site Development > System Object Types, and select SitePreferences from the list. To add preference to your new group, for each one you’ll do the following:

  1. First create the attribute: Select the Attribute Definitions tab, click New, and define your new site preference (attribute), then click Apply. Use an ID that will be unique, since that will be the identifier you use for your preference in code.
  2. Then add it to your group: Go back to Site Preferences – Attribute Definitions, select the Attribute Grouping tab, find the group you created (it may be at the bottom of the list), and then click Edit. Search for your newly-created attribute, and click Add.

When you create the attribute, you can select the Value Type – boolean, string, date, enum, etc., and define options and select a default option, if applicable:

enum_options

Accessing Preferences in Code
Once you have defined your preference, you can access it in JavaScript like so:

var System = require('dw/system');
var site = System.Site.getCurrent();
var customPreferenceValue = site.getCustomPreferenceValue('myPreferenceID').getValue();

NOTE: If your preference has a simple type (e.g. string, boolean) just use site.getCustomPreferenceValue(‘myPreferenceID’) – you don’t need the getValue() method.

A tidy way to organize this is to have a helper file in your cartridge:

// FILE: int_mycartridge/cartridge/config/myCartridgePreferences.js
var System = require('dw/system');

function getPreferences() {
    var prefs = {};
    var site = System.Site.getCurrent();
    prefs.myPreferenceID = site.getCustomPreferenceValue('myPreferenceID').getValue();
    // ... other preferences
    return prefs;
}

module.exports = getPreferences();

… which you can then use in a JS file:

var prefs = require('~/cartridge/config/myCartridgePreferences');
// prefs.myPreferenceID is now available

… or an ISML template:

<isscript>
    var prefs = require('~/cartridge/config/myCartridgePreferences');
    // prefs.myPreferenceID is now available
</isscript>

Exporting Preferences
After manually setting-up your preferences in BM, export the XML files and store in your cartridge so that they are in source control. First you’ll need to export the meta data.

  1. Go to Administration > Site Development > Import & Export
  2. Click Export under Meta Data
  3. Choose System object type definitions and click Export
  4. Download the XML file locally

Next create the following file in your cartridge (assuming your cartridge’s folder is int_my_cartridge):

int_my_cartridge/metadata/meta/system-objecttype-extensions.xml

You’ll need to manually copy/paste just the content from the export that’s relevant to your file. It’ll look something like this, where “….” will have details about your attribute:

<?xml version="1.0" encoding="UTF-8"?>
<metadata xmlns="http://www.demandware.com/xml/impex/metadata/2006-10-31">
    <type-extension type-id="SitePreferences">
        <custom-attribute-definitions>
            <attribute-definition attribute-id="myPreferenceID">
                ....
            </attribute-definition>
            <attribute-group group-id="MyGroup">
                <display-name xml:lang="x-default">My Group</display-name>
                <attribute attribute-id="myPreferenceID"/>
            </attribute-group>
        </group-definitions>
    </type-extension>
</metadata>

Logging in Salesforce Commerce Cloud

I’ve been learning SFCC recently, and found that I was missing a simple guide for server logging, so I decided to write one.

Basic Usage
First you need to get a reference to a Log object, and then you issue log statements that are the level you want (debug, info, warn, error, fatal):

var Logger = require('dw/system/Logger');
var log = Logger.getLogger('my_category');
log.warn('createRequest call took {0}ms, which is more than the threshold of {1}ms', 999, 500);

By passing just one argument to getLogger(), you will be putting your log statements in the default location – more on that below.

Finding Log Entries
There are two ways to access logs, through Business Manager (BM), neither of which are immediately obvious:

  1. The log center
  2. The actual log files

The log center is accessed in Administration / Site Development / Development Setup, although it requires specific permissions:

logcenter

The other way is to access the log files directly – also via BM – in Administration / Site Development / Development Setup, then click on Folder Browser, and navigate to the Logs directory:

folder_browser

Log Files
If you initialize the log object with one argument (e.g. getLogger('my_category')), then you are specifying the category only, and the log entries will appear in a generic file. The file will be named something like customwarn-ecom-sandbox-SANDBOX-appserver-DATE.log where “warn” is the log level.

The category will appear in the log entry:

[2021-03-23 23:46:32.086 GMT] WARN PipelineCallServlet|212645572|SITE_NAME|CONTROLLER_NAME|PipelineCall|iEHTL3fGnn custom.my_category [] createRequest call took 999ms, which is more than the threshold of 500ms

You can add a second parameter when getting the log object, which will create a new log file. This may be useful if you are developing a cartridge and want all of that cartridge’s logging information stored in one place:

var log = Logger.getLogger('my_cartridge', 'my_category');

That will create a dedicated log file like so, in the same location as the other log files:

custom-my_cartridge-ecom-SANDBOX-ITENTIFIERS-DATE.log

Enabling Log Levels
The log level you want to use must be enabled in BM under Administration / Operations / Custom Log Settings, in the Custom Log Targets section:

enabled

If it’s not, then the log entries won’t appear.

Writing a Grunt Plugin that Uses other Plugins

I’ve been using Grunt for a while now, and wanted to package some reusable functionality from one project into a plugin, so that it could easily be used in other projects. For some reason, this turned out to be a lot less intuitive than I was expecting. I read the official page on Creating Plugins, but it doesn’t mention a variety of details you need to pay attention to if you want to encapsulate other plugins within your own plugin.

There are several gotchas. First, if you simply port the 3rd-party tasks’ configurations to the plugin’s Gruntfile.js, your plugin will work when you test it (from the plugin source), but it will fail when you use your plugin, since the plugin’s Gruntfile doesn’t get processed when it is run as a plugin. You also have to explicitly load tasks you want to use, and be mindful of how you use paths to reference them.

Here are my tips on writing plugins:

  1. Clone the grunt-init gruntplugin repository and run grunt-init gruntplugin to setup the plugin template, as described in the Grunt documentation on creating plugins. This will be your plugin source. You’ll be able to run Grunt in there to test it.
  2. Right away, add your plugin to the project you wish to use it in, so that you can test it as a plugin while you develop. You don’t need to publish it, instead, in your project package.json, add it as a devDependency with a URL to its GIT repository:
    myproject/package.json
      "devDependencies": {
        "grunt-myplugin": "git@bitbucket.org:antun/grunt-myplugin.git"
      }

    As you make updates, you’ll need to commit/push, then uninstall/reinstall the plugin from your project as follows:

    $ npm rm grunt-myplugin
    $ npm install
  3. Add your 3rd-party plugins to your plugin source’s package file as dependencies, rather than devDependencies. This will ensure they’re installed under your project when your plugin is installed.
    package.json
      "dependencies": {
        "grunt-shell" : "1.1.1"
      },
  4. Explicitly load the 3rd party task you want to use, from your plugin source’s task file. This is necessary since your plugin won’t automatically have access to its own dependencies, when it’s used as a plugin in another project. Do this near the top of the task file. e.g. If you rely on the grunt-shell module within your plugin, would do:
    tasks/buttonimage.js
    module.exports = function(grunt) {
      var path = require('path');
      grunt.task.loadTasks(path.resolve(__dirname, '../node_modules/grunt-shell/tasks'));
      // load any other tasks, and task registration
    }

    Note also that I used the Node.js path.resolve() method to handle loading the URL relative to the plugin, no matter where it’s run from. Since path is a core Node.js module, you can require it without any special dependency handling.

  5. Define your plugin’s custom task(s) in its source Gruntfile. Organize the options as you would like to see them used when it is used as a plugin. Remember, this configuration will only be used when you run your plugin’s tasks from within the source.
    Gruntfile.js
      grunt.initConfig({
        buttonimage: {
          testButton: { 
              output: 'dist/testButton.gif'
          }
        }
        /* Other configuration, test, stuff */
      }

    You can use this.options() inside of your

  6. Don’t bother adding configuration for your 3rd-party tasks in the plugin source Gruntfile. The source Gruntfile doesn’t get processed when you run your plugin in another project. Instead, set the configuration procedurally from within your task file using grunt.config.set() before running the task. e.g.
    tasks/buttonimage.js
      grunt.registerMultiTask('buttonimage', 'Generate localized buttons with text labels.', function() {
        var cmd = 'some shell command you built up';
        grunt.config.set('shell', {
            buttonImage: {
                command: cmd
            }
          }
        );
        grunt.task.run(['shell:buttonImage']);
      });
  7. Don’t change the working directory in your task, so work with absolute paths instead. Use path.resolve() to get an absolute path relative to the top-level Gruntfile for files that you will want to operate on. When you define file paths in the Gruntfile, whether that’s the one in your plugin source config or eventually the one in the project where you will use your plugin, you will want to convert them to absolute paths. To do this, use the Node.js path.resolve() method to convert the input path – which is relative to the root Gruntfile – to an absolute path:
    tasks/buttonimage.js
      grunt.registerMultiTask('buttonimage', 'Generate localized buttons with text labels.', function() {
        var outputPath = path.resolve(this.options().output);
        var cmd = "convert -some arguments " + outputPath
        /* Set the config and run your task */
      }

    If you need to get an absolute path relative to your task definition (e.g. to run a Node.js script that you have bundled inside your plugin), you can use path.resolve(__dirname, ‘path/relative/to/task/file.js’) to get that.

Hopefully these will save you some time!